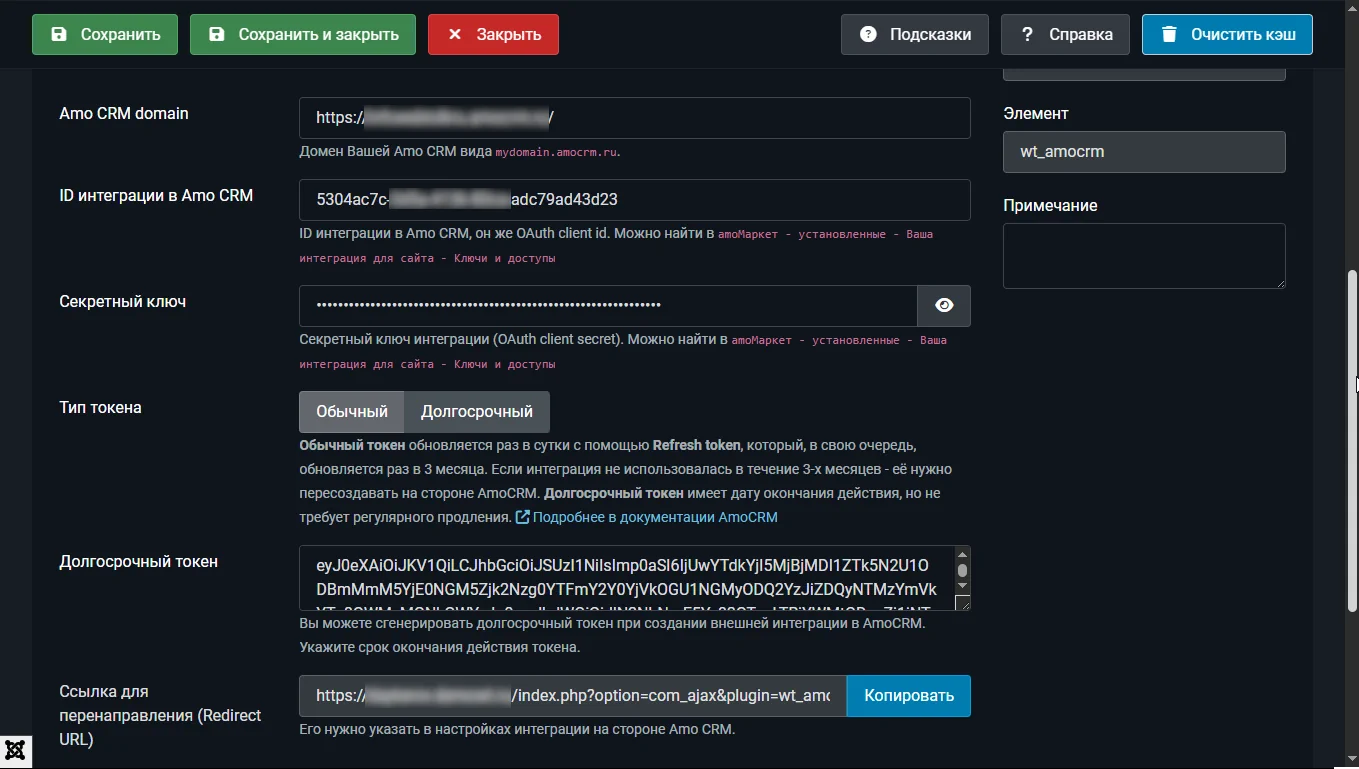
How to install and configure the amoCRM library in Joomla. Creating API integration on the Amo CRM side.
Installing the extension in Joomla
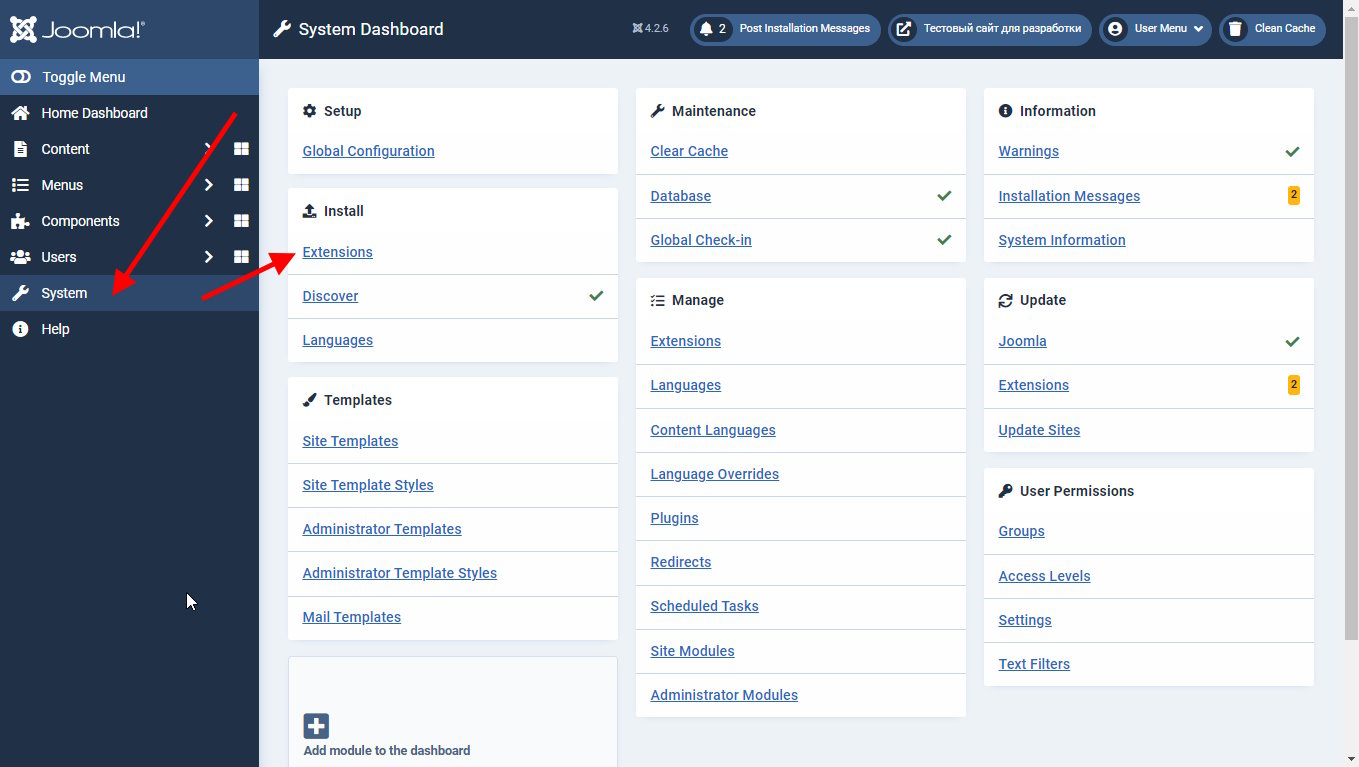
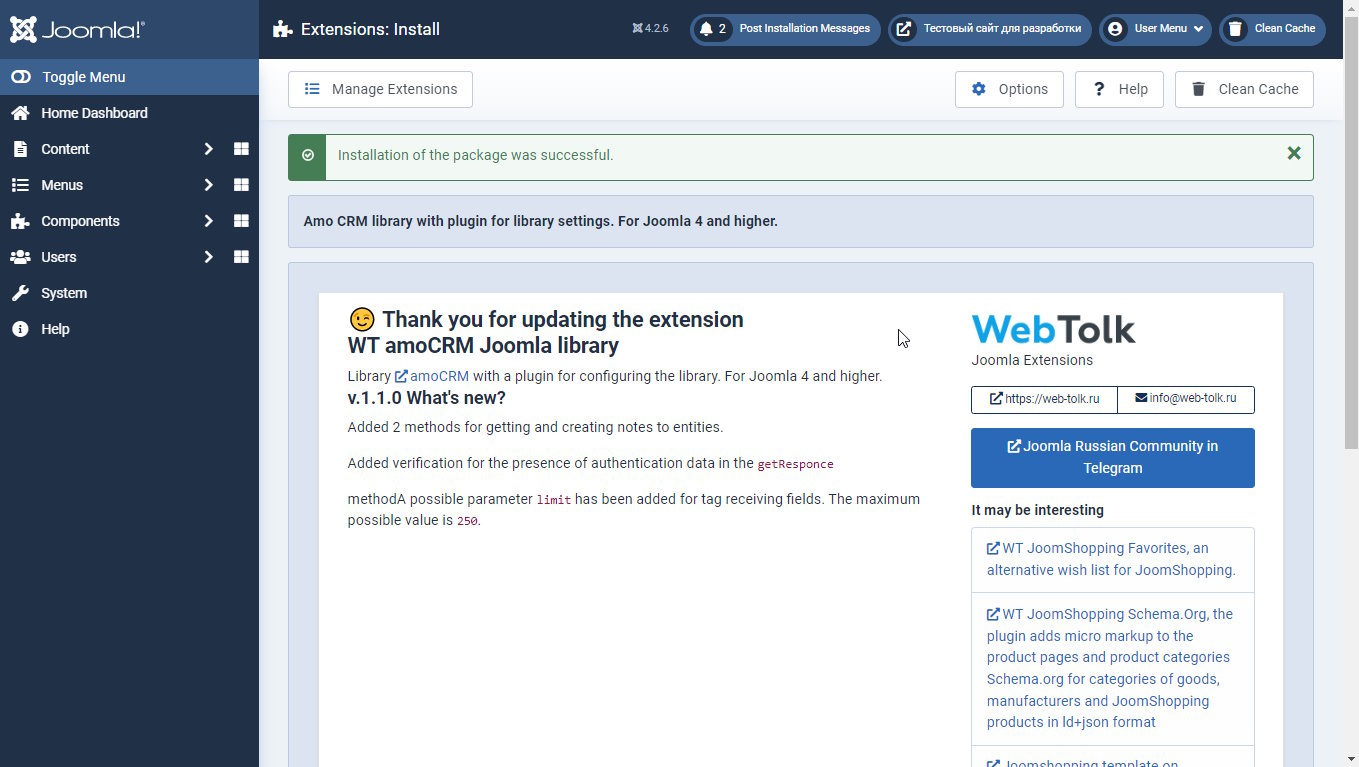
The library is installed and updated in the standard Joomla way through the extension manager. Go to System - Installation - Extensions.
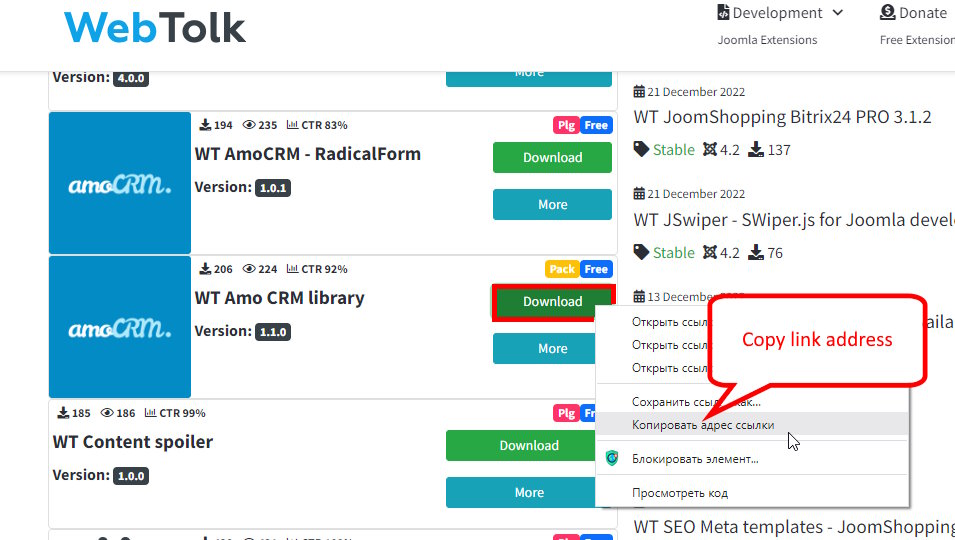
Go back to the extension page on the site https://web-tolk.ru , right-click on the "download" button and select "copy link address". The download link is copied to the clipboard.
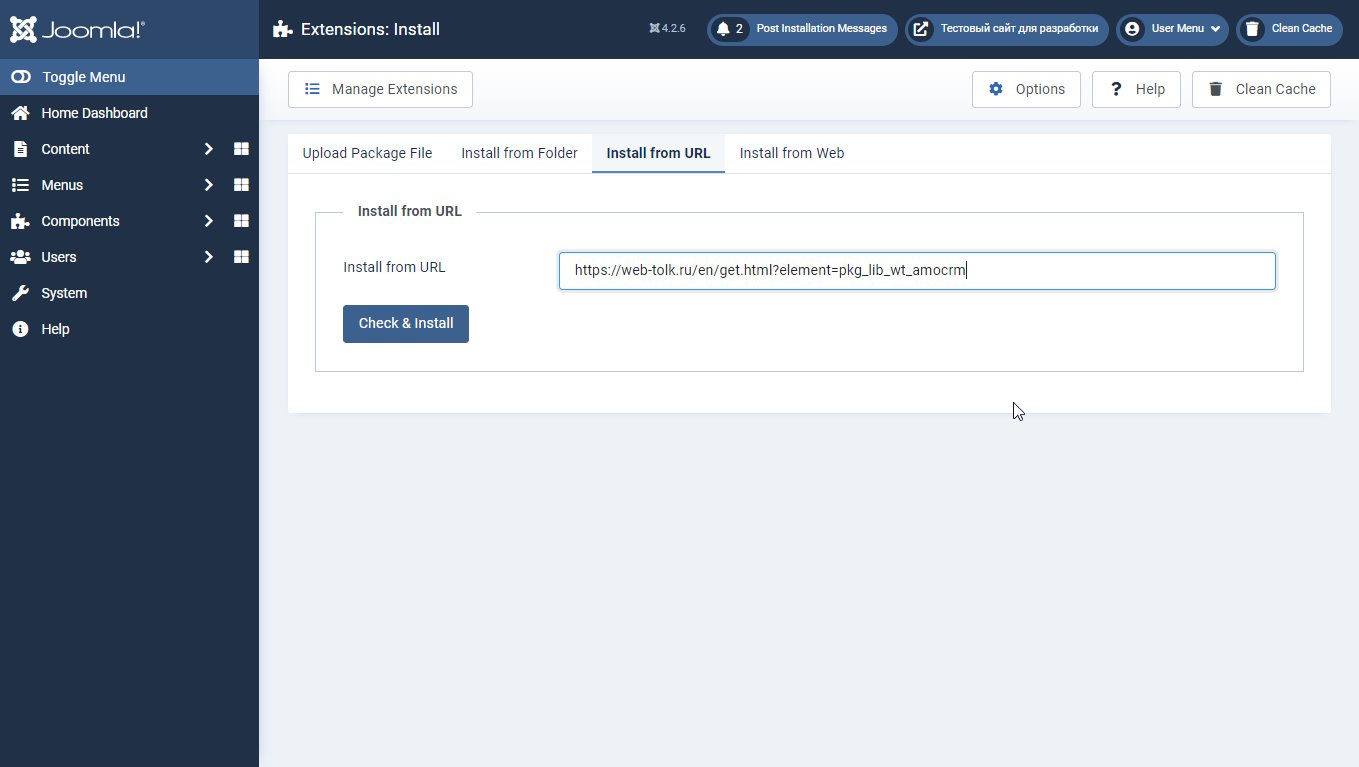
In the extensions installation section, select the "Install by URL" tab and click "Check and Install". Alternatively, pre-download the zip archive and install it via the "Download and Install" tab.
After successful installation, the welcome screen of the extension will be displayed.
Configuring the Amo CRM Library in Joomla
The library consists of the library itself and a system plugin for library settings. Also, this system plugin registers the namespace of the library in the Joomla namespace. Thus, if the plugin is disabled, you will not be able to use the library and accessing its namespace will cause an error.
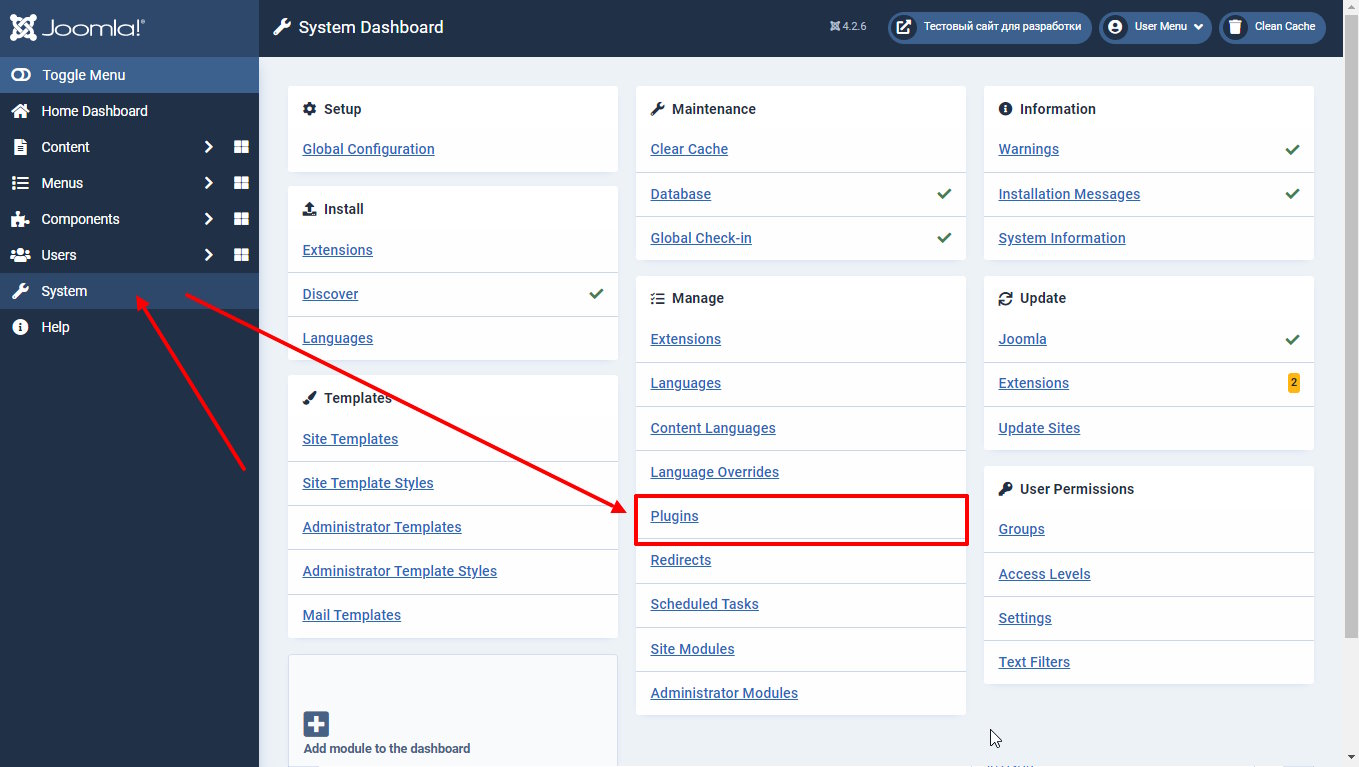
Go to System - Management - Plugins.
Find the System - WT Amo CRM Library plugin in the plugin search.
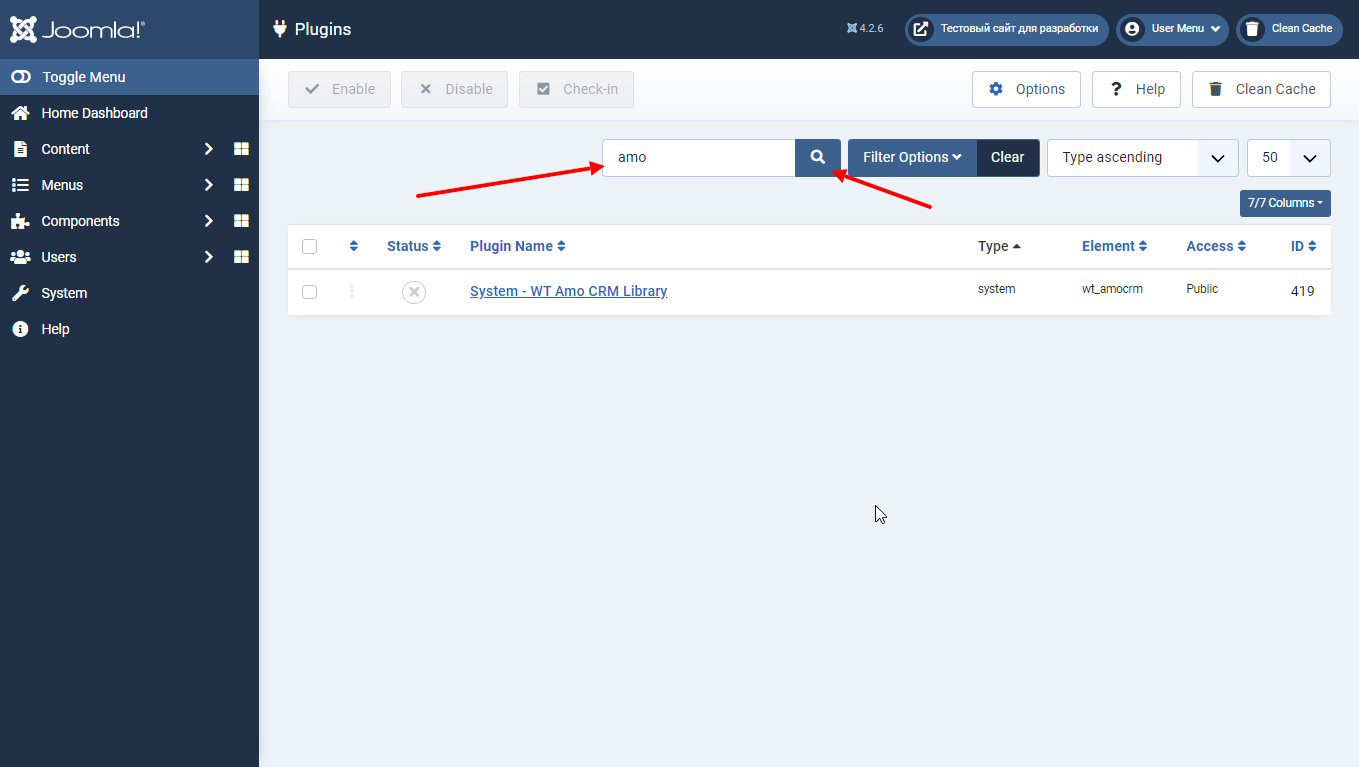
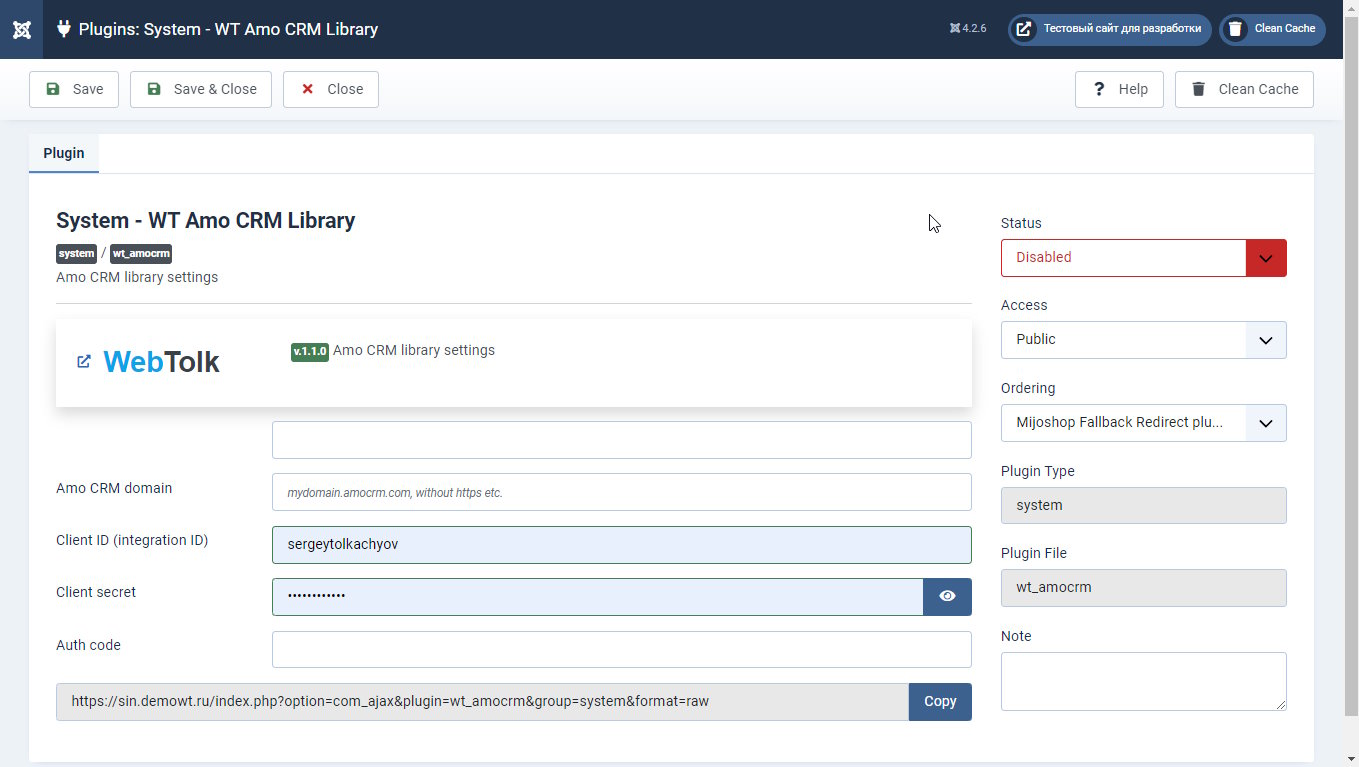
By default, the plugin is disabled and does not turn on automatically during installation. Since authentication data is not specified, an error message will be displayed: Plugin System - WT Amo CRM: there is no credentials data.
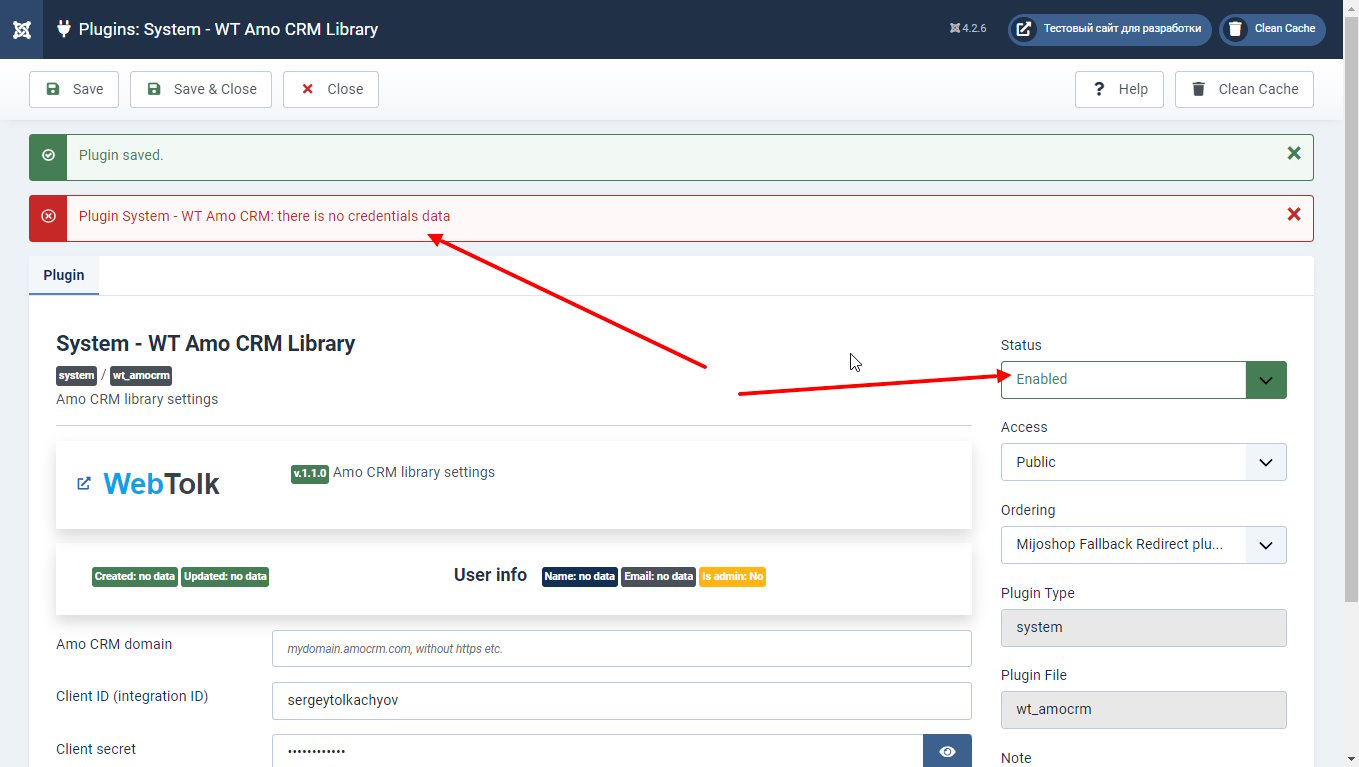
For the library to work, you need to specify the API integration data, which is created in the amoCRM interface.
Creating external integration using the amoCRM API
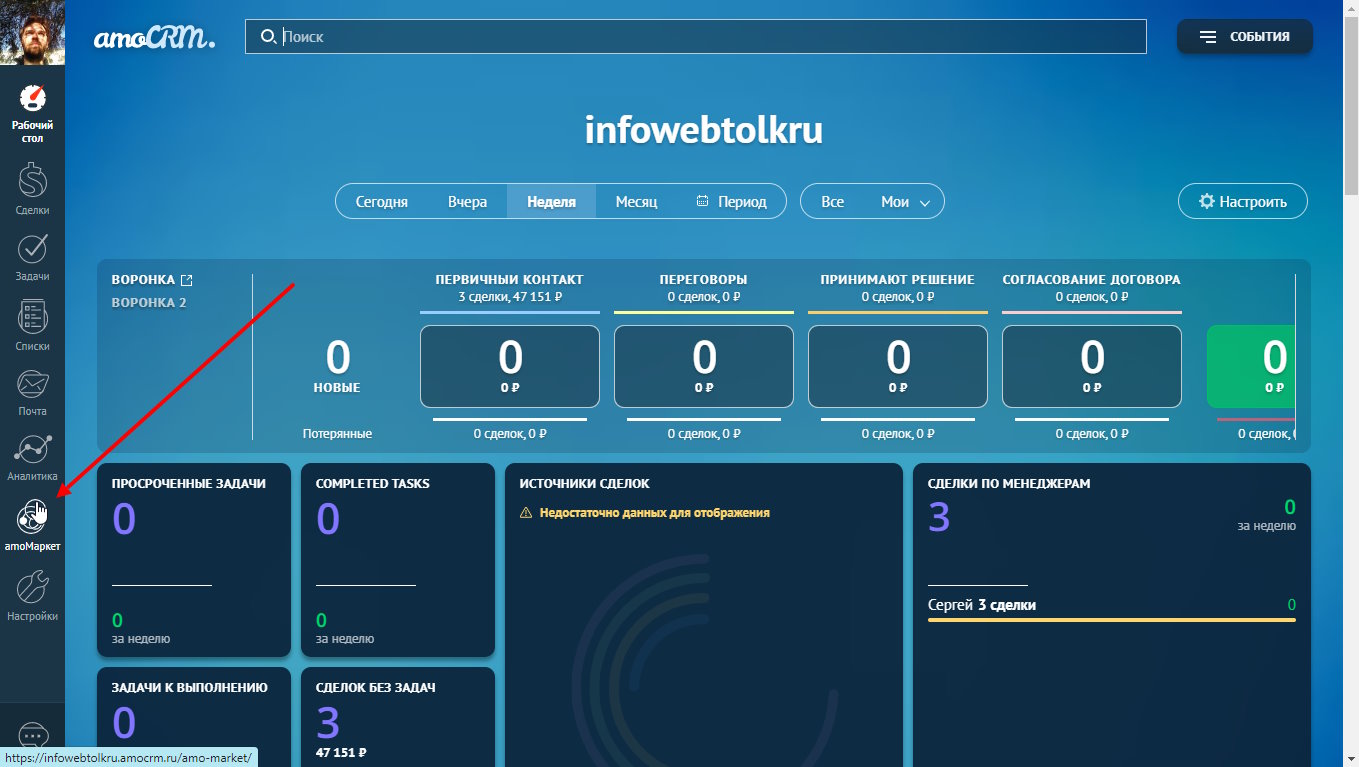
Log in to your amoCRM portal. Select the amoMarket section in the left menu.
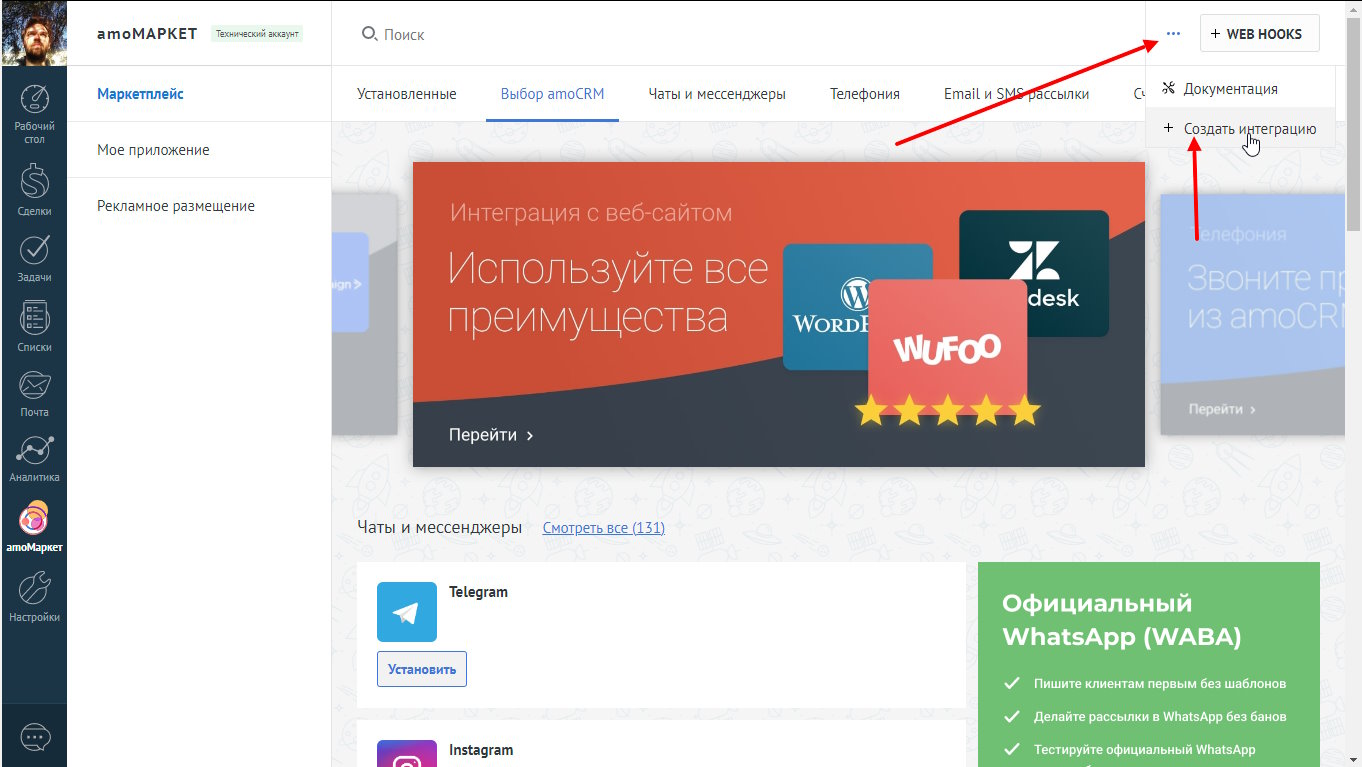
To create an API integration, select "Create Integration" in the drop-down menu with three dots near the WEB HOOKS button in the AmoMarket section.
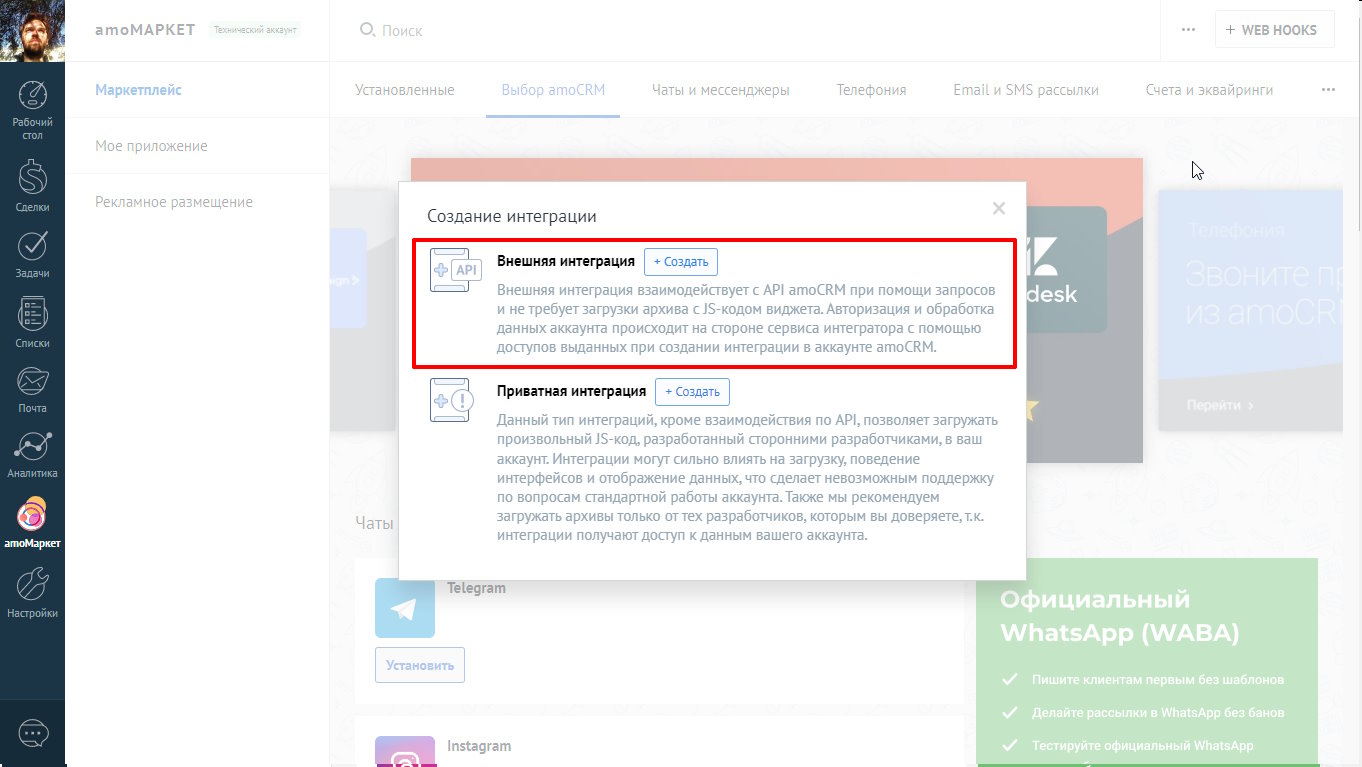
In the modal window "Creating integration", select the type "External integration". The description of the integration type says:
External integration interacts with the amoCRM API using requests and does not require downloading an archive with the widget's JS code. Authorization and processing of account data takes place on the side of the integrator service using the access granted when creating integration in the amoCRM account.
To create Joomla and Amo CRM integration, you need to specify the URL for the integration webhooks, which you can copy from the plugin settingsSystem - WT Amo CRM Library. At the moment, webhooks at this URL are not processed in any way. In the next versions of the library, the ability to process them will be added.
Also, to create it, you will need to specify the integration access rights (all), enable duplicate control, specify its name and description.
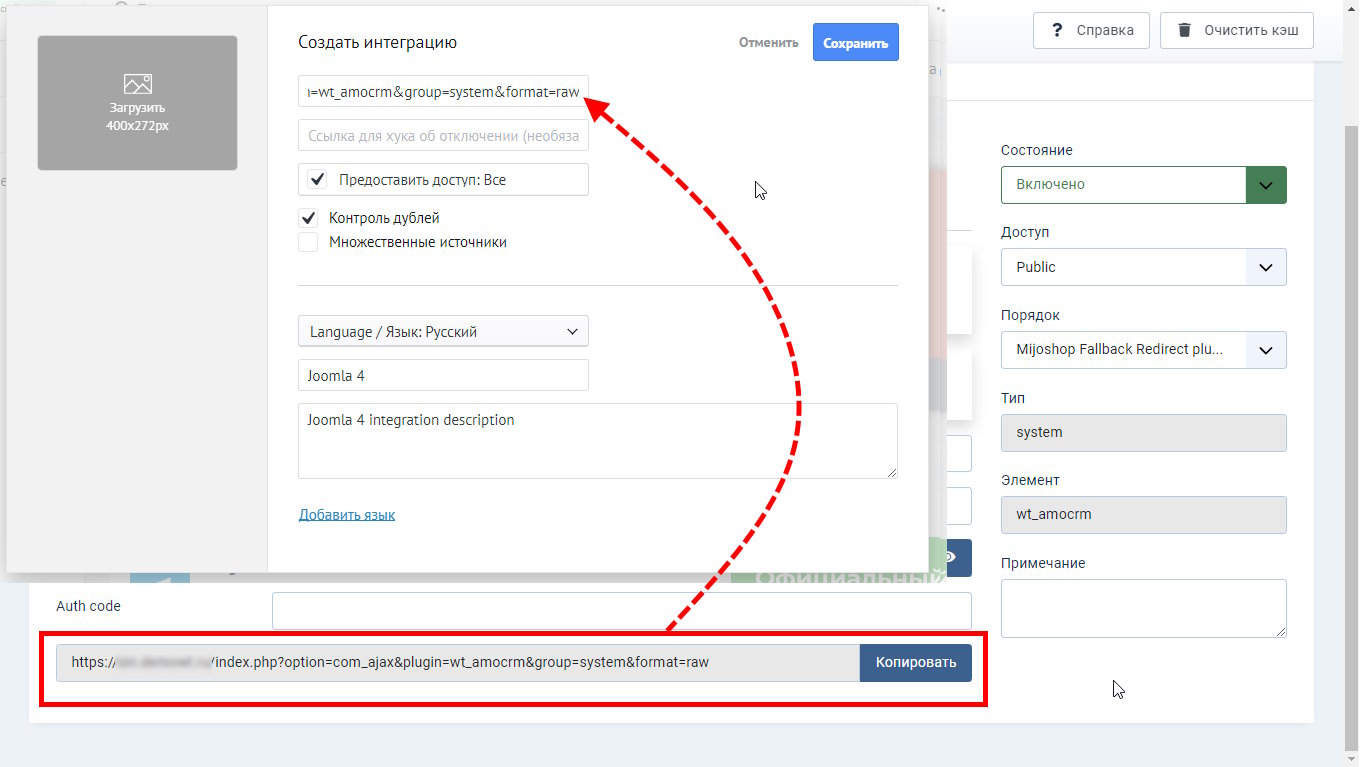
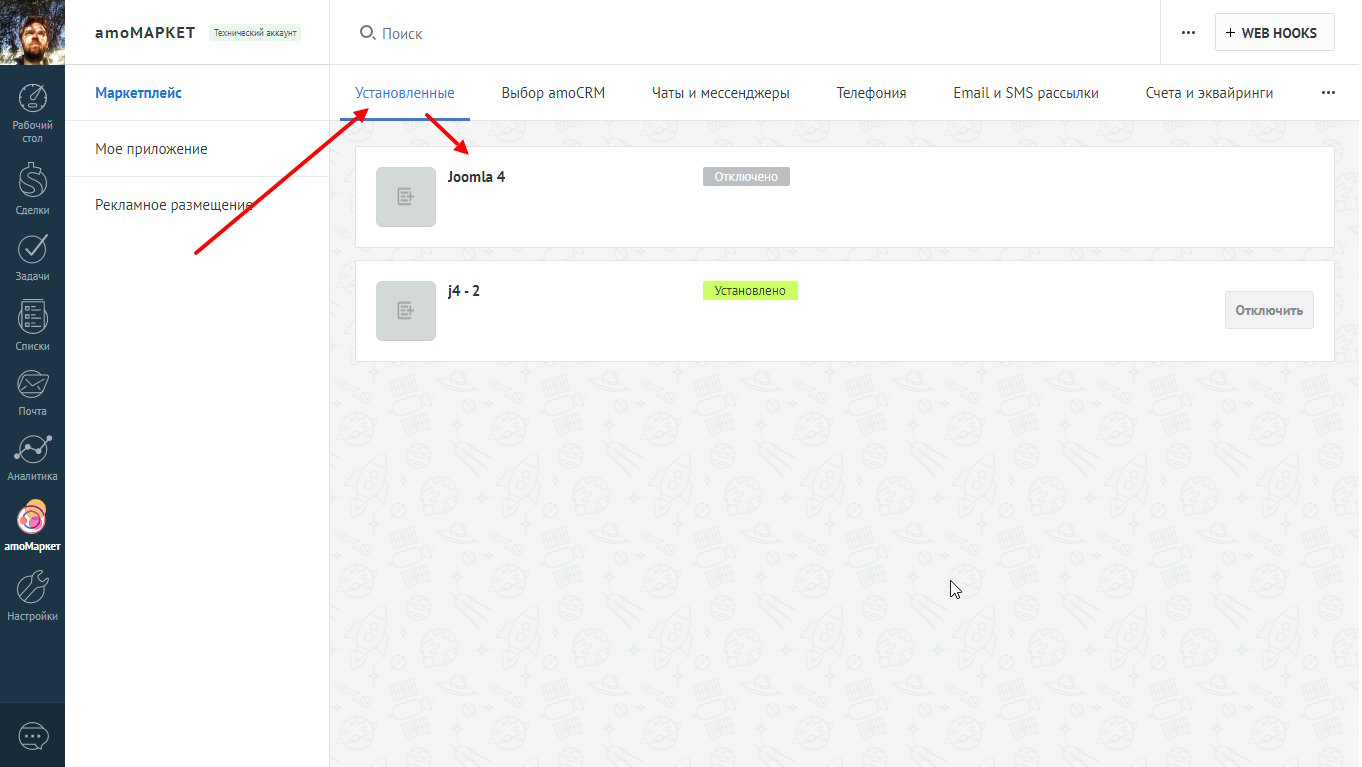
The created integration can be seen in the section amoCRM - AmoMarket - Installed - the name of your integration.
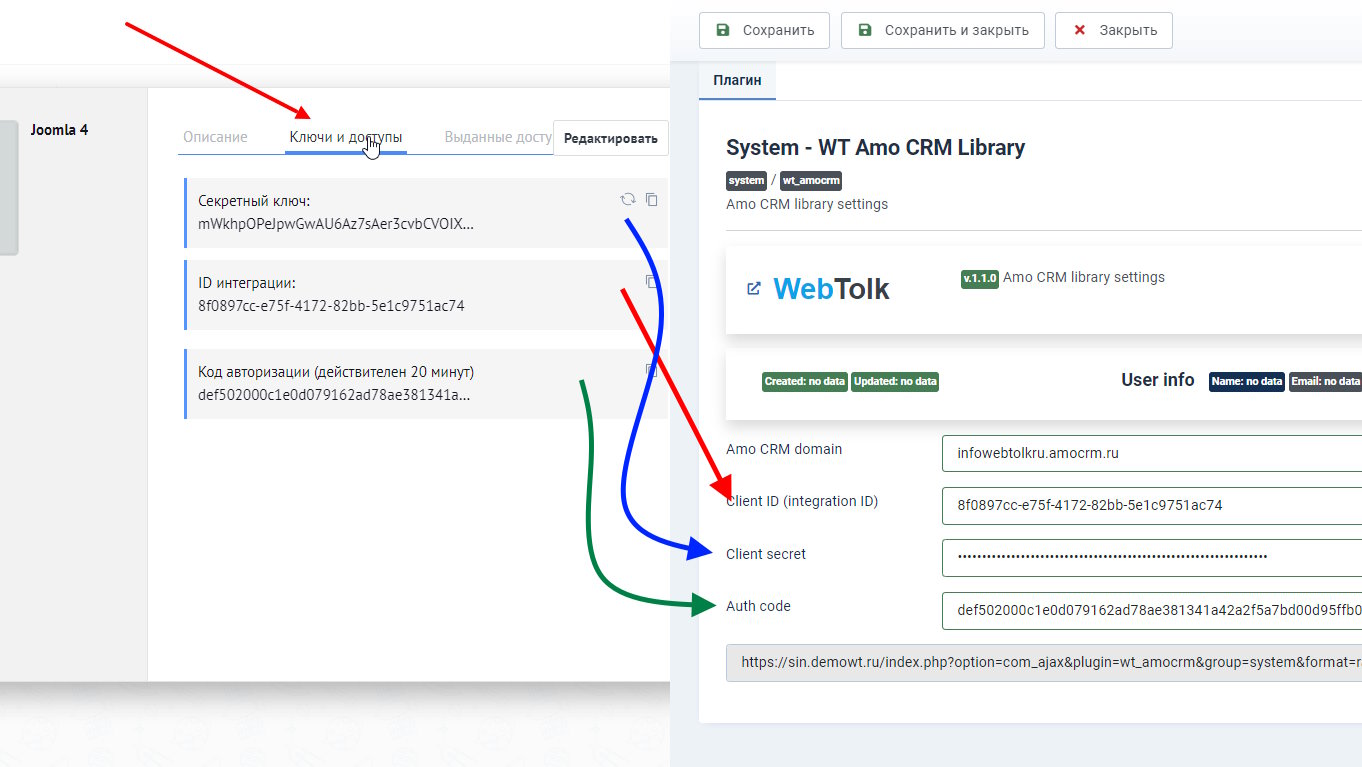
It is necessary to copy from the "Keys and Accesses" tab to the plugin settings:
- secret key - in the plugin settings it is Client secret.
- Integration ID - in the plugin settings it is Client ID
- Authorization code - in the plugin settings it is Auth code
The authorization code is valid for 20 minutes and can be used only once. After 20 minutes or unsuccessful authorization, the integration into Amo CRM will have to be recreated.
After successful authorization, amoCRM issues a refresh token, which is valid for one day and is stored in the database in the library parameters. The token is updated automatically when integration is used.
If the integration has not been used for 3 months, it will have to be recreated again.
In case of successful connection and receipt of the refresh token, a field of the accountinfo type with portal and user data will be displayed in the plugin settings.
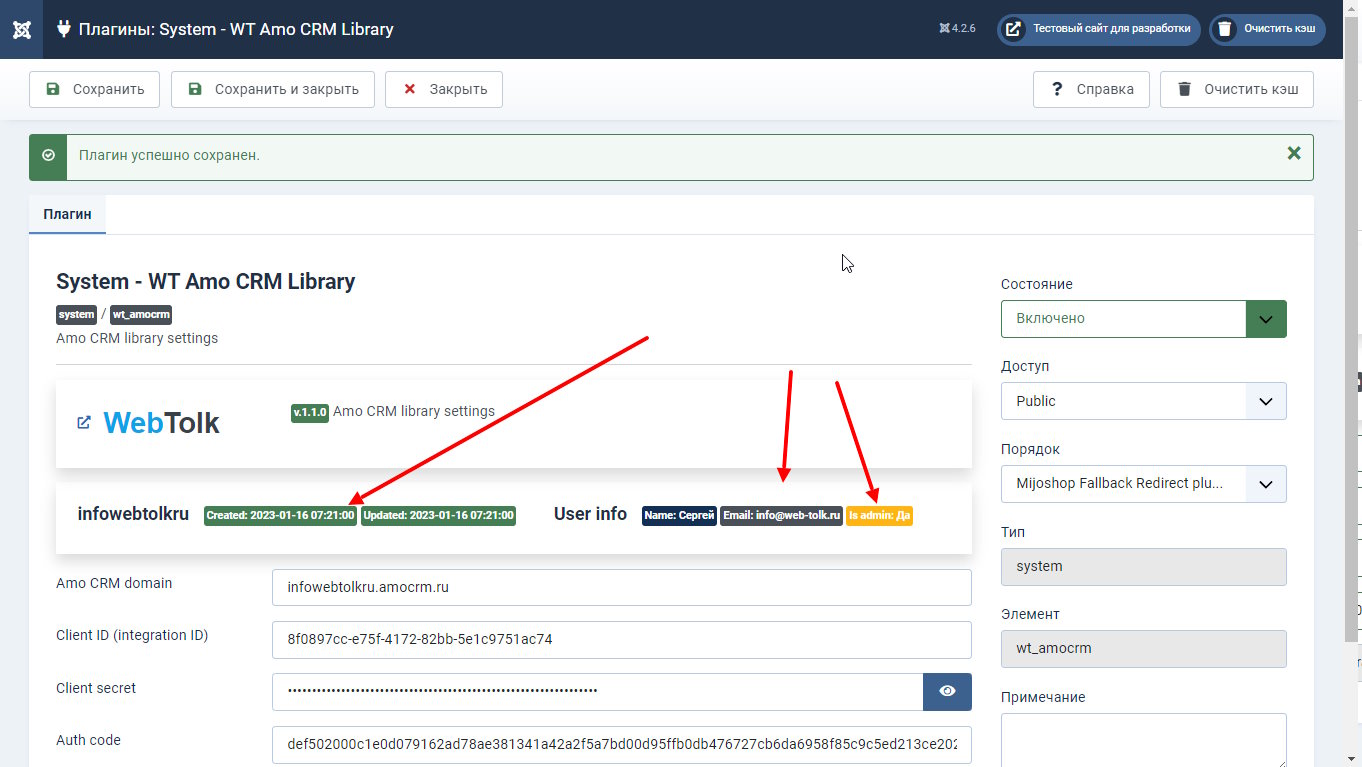
At this point, the installation and connection can be considered completed. The library can be connected via use Webtolk\Amocrm\Amocrm; and use its methods in its extensions.
Long-term amoCRM tokens in Joomla
Starting from version 1.3.0, the library supports authorization using long-term amoCRM tokens. They differ from the standard ones with a limited validity period, which can be up to 5 years. Thus, even if your integration has been inactive for more than 3 months, the token will still be valid. On the other hand, you need to independently track the expiration date of the token and update it if necessary.
