WebTolk Joomla Extensions
110 Extensions
12 Categories
560 Versions released
792258 Downloads
How to use a custom HTML layout as a marker for a Yandex.Maps placemark.
You can create your own unique HTML layouts for the placemark markers and use not only the image and title of the Joomla article in them, but also data from custom fields.
In Joomla, there is a concept of layout. This is a piece of layout that can be used a lot anywhere on the site: both in the admin panel and in the frontend. Layouts can be considered as design elements divorced from the context. They are located in the layouts folder at the root of the site. The marker layouts of the WT Yandex map items module are located in the /layouts/modules/mod_wtyandexmapitems/marker folder. You can create your own layouts both in this folder and in the html folder of your template.
The path to the layout is indicated separated by dots, relative to the folder "/layouts/" in the root of the site. For example, the value "modules.mod_wt yandex map items.marker.default" means that the path to the layout looks like this - "/layouts/modules/mod_wtyandexmapitems/marker/default.php". The slash characters "/" are replaced by the dot character ".". In these files, the layout of your unique marker will be located along this path.
Depending on the scenarios on the site, you will need to create one or two custom fields that will specify the paths to the layouts. Also, depending on the number of layouts used and WHO exactly will work with the site - the webmaster or the content manager - you choose the types of fields to create: just a text field or a list, a checkbox, radio buttons.
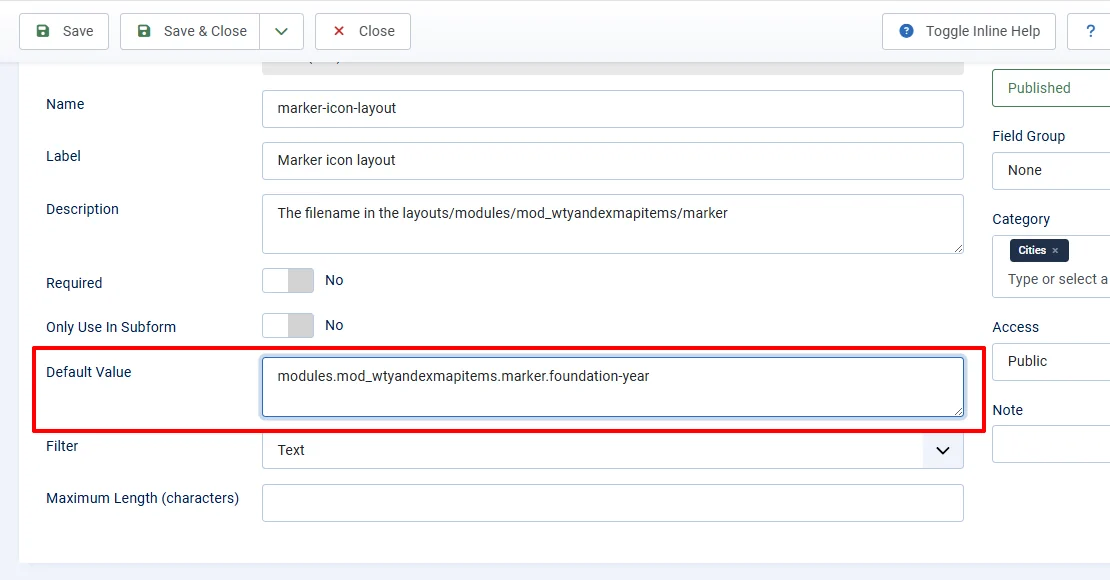
If you are creating a single layout and you do not plan to switch to other layouts, you can create a custom text field and specify the path to the layout in it.
In the field settings, you can specify its default value, and then it will always be filled in when creating a aricle or category. If necessary, you will specify a different layout in the already filled field.
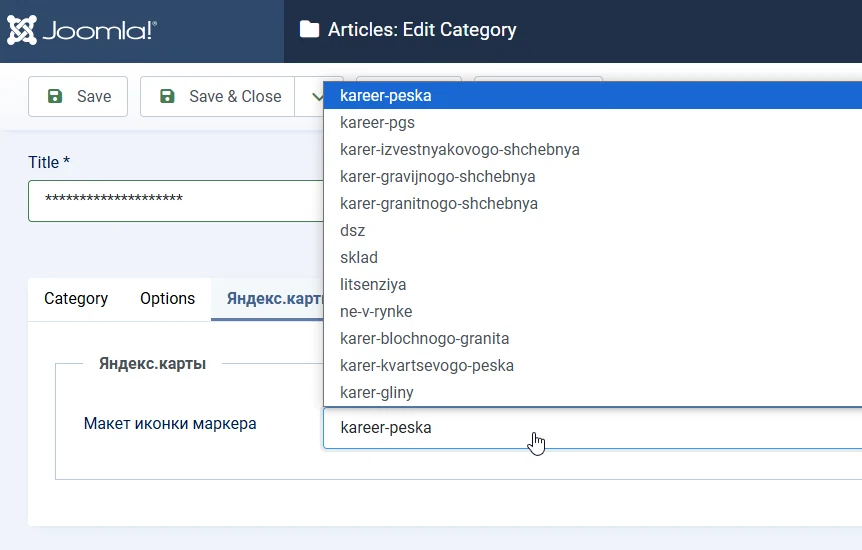
This approach is generally normal for a webmaster who is familiar with the Joomla code and understands what these words and dots mean. If content managers will work with the site, then for their convenience, you can create a list field or radio buttons that will allow you to select layouts in a more friendly interface.
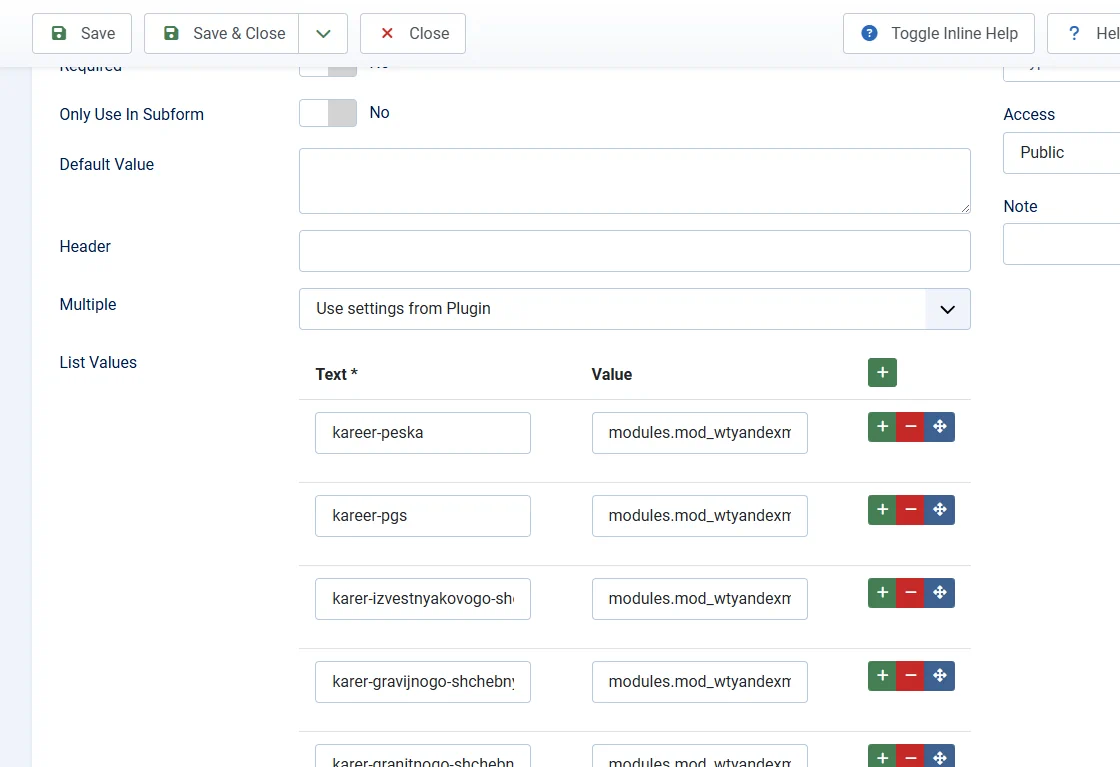
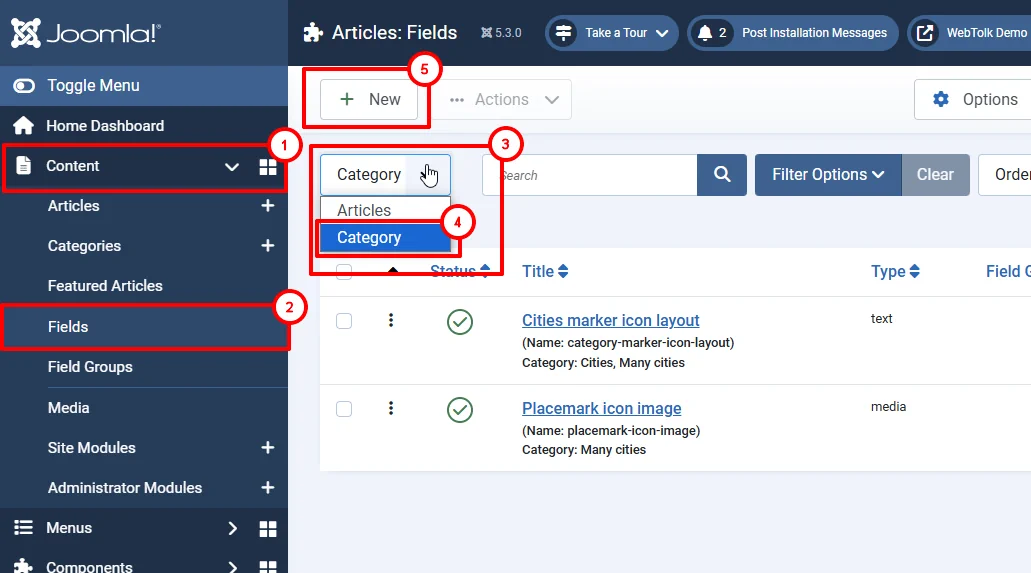
In the created Joomla list field, "text" is the displayed name of the layout, and "value" is the path you need to specify to the file.
In the settings of the WT Yandex map items module, go to the Articles tab and fill in the "Article fields for the marker layout (comma-separated enumeration)" field.
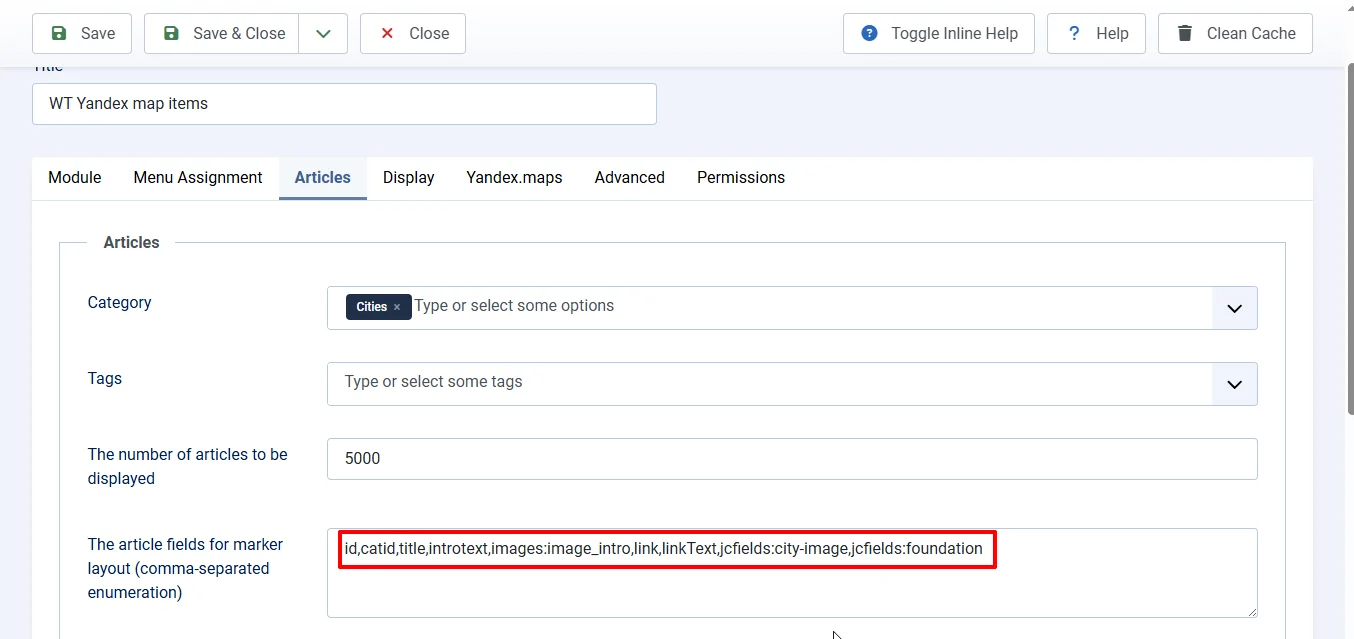
You can get the article properties in the layout by specifying a construction like ${item.[PROPERTY NAME]}, for example, ${item.title} for the title of the article. The images of the article can be obtained as follows: ${item.images.image_intro.url} - the url of the image of the introtext. ${item.images.image_intro.attributes.width} and ${item.images.image_intro.attributes.height} are the width and height of the image. Similarly, for the image of the full text - image_fulltext.
All properties of the Joomla article object. Some of them don't make sense to transfer to the layout.
To get the value of a custom field in the layout, specify the jcfields: keyword in the module settings (with a colon) and then the system name of the field (alias). For example, jcfields:city, jcfields:price. In the layout, the rawvalue of the field will be available to you - that is, the value without the HTML render.
For a media type field, the rawvalue is an object that contains the alt_text properties, the url path to the image, and attributes (an object with the image attributes height and width).
You can view all the data in the browser console, in the Network tab. Filter out only Fetch/XHR requests, refresh the page, and find the ajax request to the index module.php?option=com_ajax&module=wtyandexmapitems&module_id=[MODULE ID]&format=raw preview of the server response.
If you want to display the same marker layout for all the articles in a category, you need to go through the following steps.
In our example, this will be a text type field, but you can use a list, radio buttons, or checkboxes type field (with the only possible value).
If necessary, specify the default value - the path to the default layout, unless a separate layout has been created for the content category. Then, when creating a category, the field will be filled in with the default value automatically.
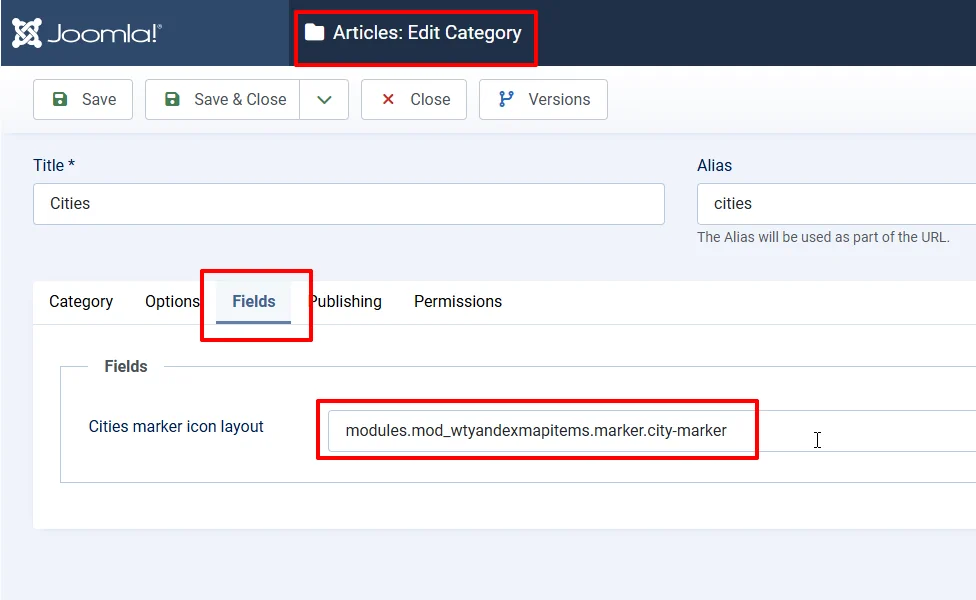
The path starts from the layouts folder in the root of the site. For example, the path modules.mod_wtyandexmapitems.marker.city-marker means that the layout file is being used. layouts/modules/mod_wtyandexmapitems/marker/city-marker.php .
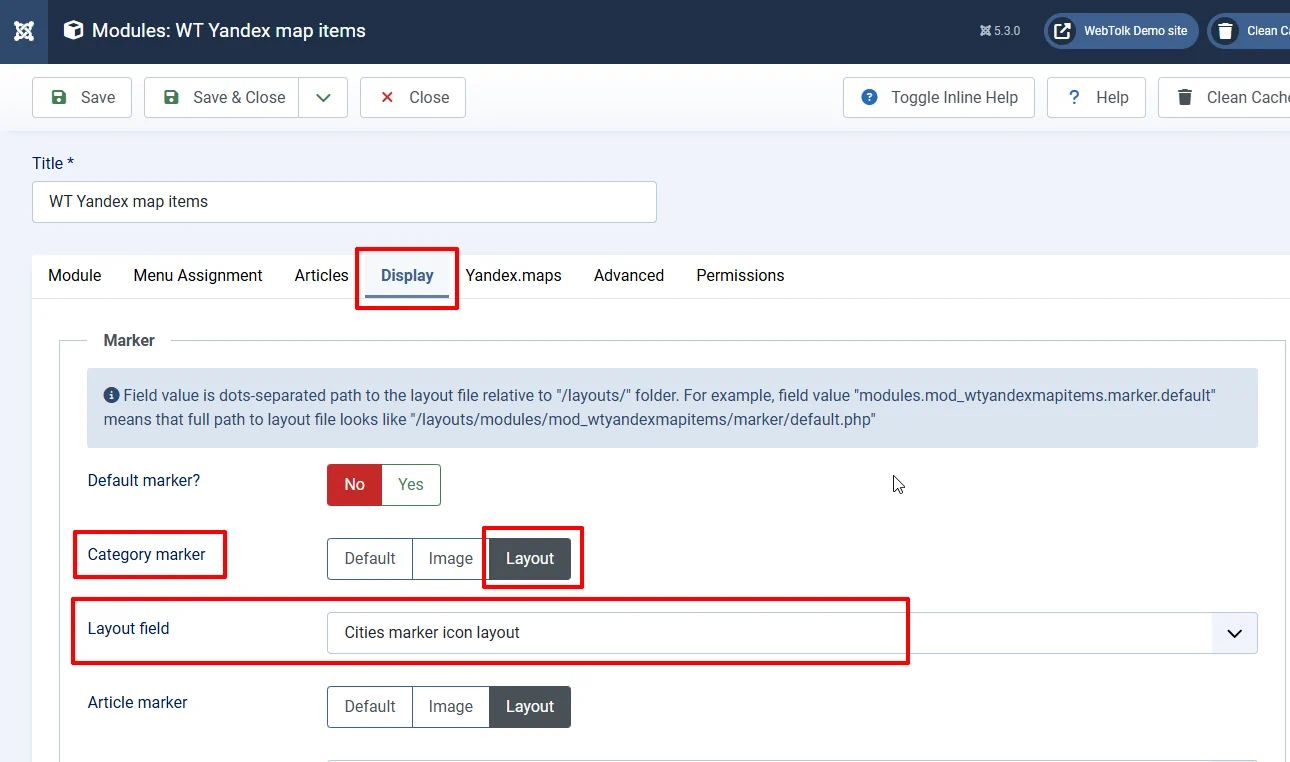
Go to the "Display" tab in the module parameters. Set "default marker" to "none", "category marker" to "layout". In the "layout field" field that appears, select the field you created earlier, where the path to the layout will be indicated. Save the module.
And upload it to the layouts/modules/mod_wtyandexmapitems/marker folder on the website.
Marker layout code sample.
<?php
use Joomla\CMS\Factory;

defined('_JEXEC') or die;

$doc = Factory::getApplication()->getDocument();
/** @var $wa \Joomla\CMS\WebAsset\WebAssetManager */
$wa = $doc->getWebAssetManager();
$wa->addInlineStyle("

    .marker2.category-layout {
        position: relative;
    }
    .marker2.category-layout .marker-city-image img {
        max-width: none;
        cursor: pointer;
        width: 64px;
        height: 64px;
        object-fit: cover;
        border-radius: 25%;
        left: -30px;
        position: absolute;
		border: 2px solid var(--bs-warning);
        top: -80px;
    }
    .marker2.category-layout .line {
        width: 2px;
        height: 12px;
        background-color: var(--bs-warning);
        position: absolute;
		left: 1px;
        top: -16px;
    }
    .marker2.category-layout .point {
        width: 4px;
        height: 4px;
        background-color: var(--bs-warning);
        border-radius: 50%;
    }
    .marker2.category-layout .item-title {
        position: absolute;
        left: 40px;
        margin: 0;
        top: -65px;
    }

	.marker2.category-layout .layout-info{
		position: absolute;
        left: 40px;
        margin: 0;
        top: -40px;
	}
");
?>
<div class="marker2 position-relative category-layout">
	<div class="marker-city-image">
		<img src="/${item.jcfields.city-image.rawvalue.url}">
	</div>
	<div class="badge bg-info layout-info">Category marker layout</div>
    <div class="line"></div>
    <div class="point"></div>
    <div class="badge bg-warning item-title">${item.title}</div>
</div>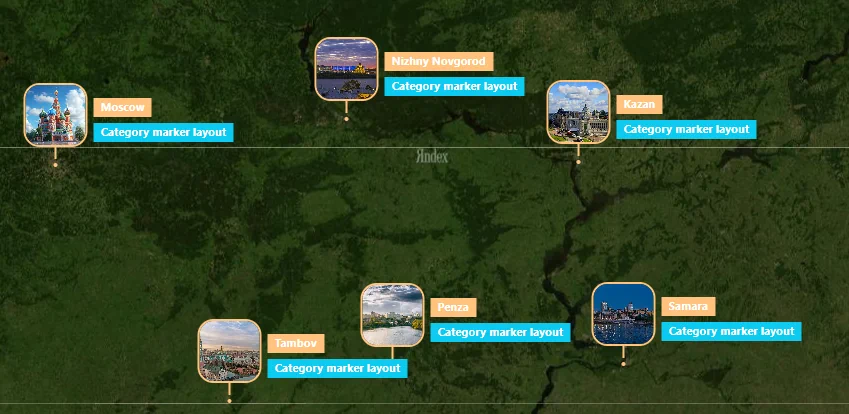
CSS can be placed in the template.css of your template, and you can also use the classes of your CSS framework (Bootstrap, UIKit, etc.). Note that the placeholder is ${item.jcfields.city-image.rawvalue.url} will be replaced with the url of the image, and the placeholder ${item.title} will be replaced with the title of the article. You can always view the current data structure and the data itself in the browser console.
When rendering the marker layout, you will only have access to the data of the material and user fields that you specified in the "Fields of the material for the marker layout (comma-separated enumeration)" field.
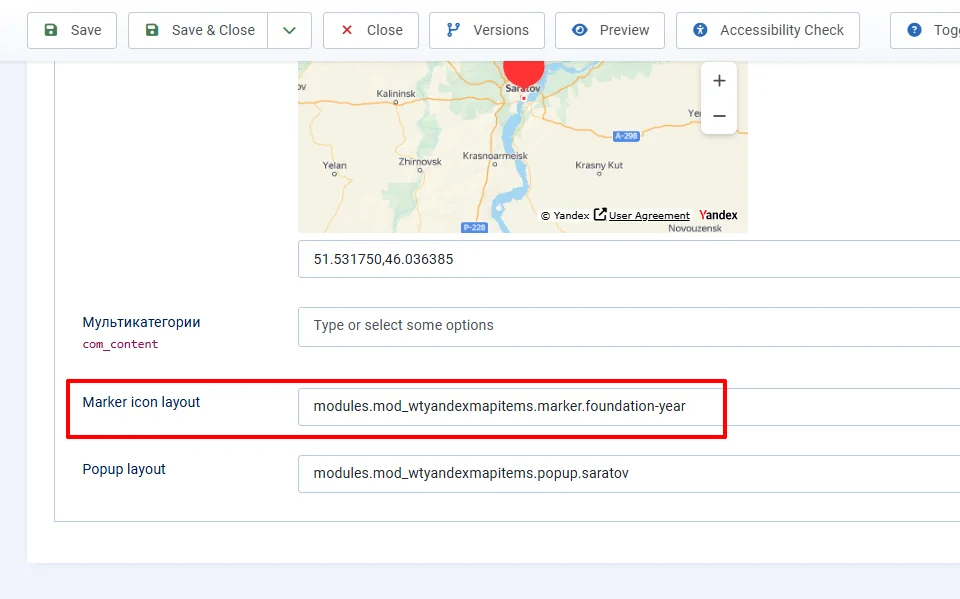
You can specify special layouts for each Joomla article, thereby highlighting them among other labels on the Yandex.map. To do this, create a field where you will specify the path to the layout, but for the article. In the module settings, select the created field as the source of the path to the map marker layout for the article.
If the article layout field is not filled in, the layout specified in the category field (a common marker for all) will be used. If filled in, the article value overrides the category value.
You can use the data of custom article fields in the layout: time, prices, tags, ratings, discounts, and so on. As an example, the year of the city's foundation is shown on the map.
Sample code for an alternative map marker layout for Joomla article:
<?php

use Joomla\CMS\Factory;

defined('_JEXEC') or die;

$doc = Factory::getApplication()->getDocument();
/** @var $wa \Joomla\CMS\WebAsset\WebAssetManager */
$wa = $doc->getWebAssetManager();
$wa->addInlineStyle("
    .marker {
        position: relative;
    }
    .marker.color-blink img {
        max-width: none;
        cursor: pointer;
        width: 64px;
        height: 64px;
        object-fit: cover;
        border-radius: 50%;
        left: -30px;
        position: absolute;
        top: -80px;
		border: 3px solid var(--bs-danger);
		animation: color-blink 8s infinite;
    }
    .marker .line {
        width: 2px;
        height: 12px;
        background-color: var(--bs-danger);
        position: absolute;
		left: 1px;
        top: -16px;
		animation: color-blink 8s infinite;
    }
    .marker .point {
        width: 4px;
        height: 4px;
        background-color: var(--bs-danger);
        border-radius: 50%;
		animation: color-blink 8s infinite;
    }
    .marker .text {
        position: absolute;
        left: 40px;
        margin: 0;
        transform: translateY(-50%);
        top: -40px;
        white-space: nowrap;
        background-color: white;
        color: black;
        border-radius: 6px;
        padding: 3px 6px;
        font-size: 14px;
        line-height: 16px;
        max-width: 180px;
        text-overflow: ellipsis;
        overflow: hidden;
    }
	.marker .foundation {
		position: absolute;
        left: 40px;
        margin: 0;
        transform: translateY(-50%);
        top: -10px;
	}

	.color-blink {

	}

	@keyframes color-blink {
	  0% { background-color: rgba(214,51,132,1); border-color: rgba(214,51,132,1); box-shadow: none;}
	  33% { background-color: rgba(25,135,84,0.75);border-color: rgba(25,135,84,0.75); box-shadow: 0px 0px 15px rgba(255,255,255,0.7)}
	  66% { background-color: rgba(220,53,69,0.75); border-color: rgba(220,53,69,0.75); box-shadow: 0px 0px 35px rgba(255,255,255,0.7);}
	  100% { background-color: rgba(214,51,132,1);border-color: rgba(214,51,132,1); box-shadow: none;}
	}
");
?>
<div class="marker position-realtive color-blink">
	<div class="foundation badge bg-success">
	${item.jcfields.foundation.rawvalue} year.
	</div>
	<img src="/${item.jcfields.city-image.rawvalue.url}">
    <div class="line"></div>
    <div class="point"></div>
    <div class="text">${item.title}</div>

</div>
The foundation year field in the settings is specified as jcfields:foundation, and in the layout code it is available as ${item.jcfields.foundation.rawvalue}.